The Server Sections tool allows you to control your server layout and rotation in real-time. To access the Server Sections tab navigate to the menu button in the top-left corner of the iPad, then click "Server Sections". All workflows in the following article will happen under this tab.
Skip to:
- Creating Layouts, Sections, and Assigning Servers
- Selecting and Activating Layouts
- Cutting Servers
- Reassigning or Unassigning Tables from Sections
- Removing a Section from a Layout
- Deleting a Layout
- Adding and Managing Servers
- Closing and Opening Server Sections
- Bulk Opening/Closing Tables
- Server Section Settings
Creating Layouts, Sections, and Assigning Servers
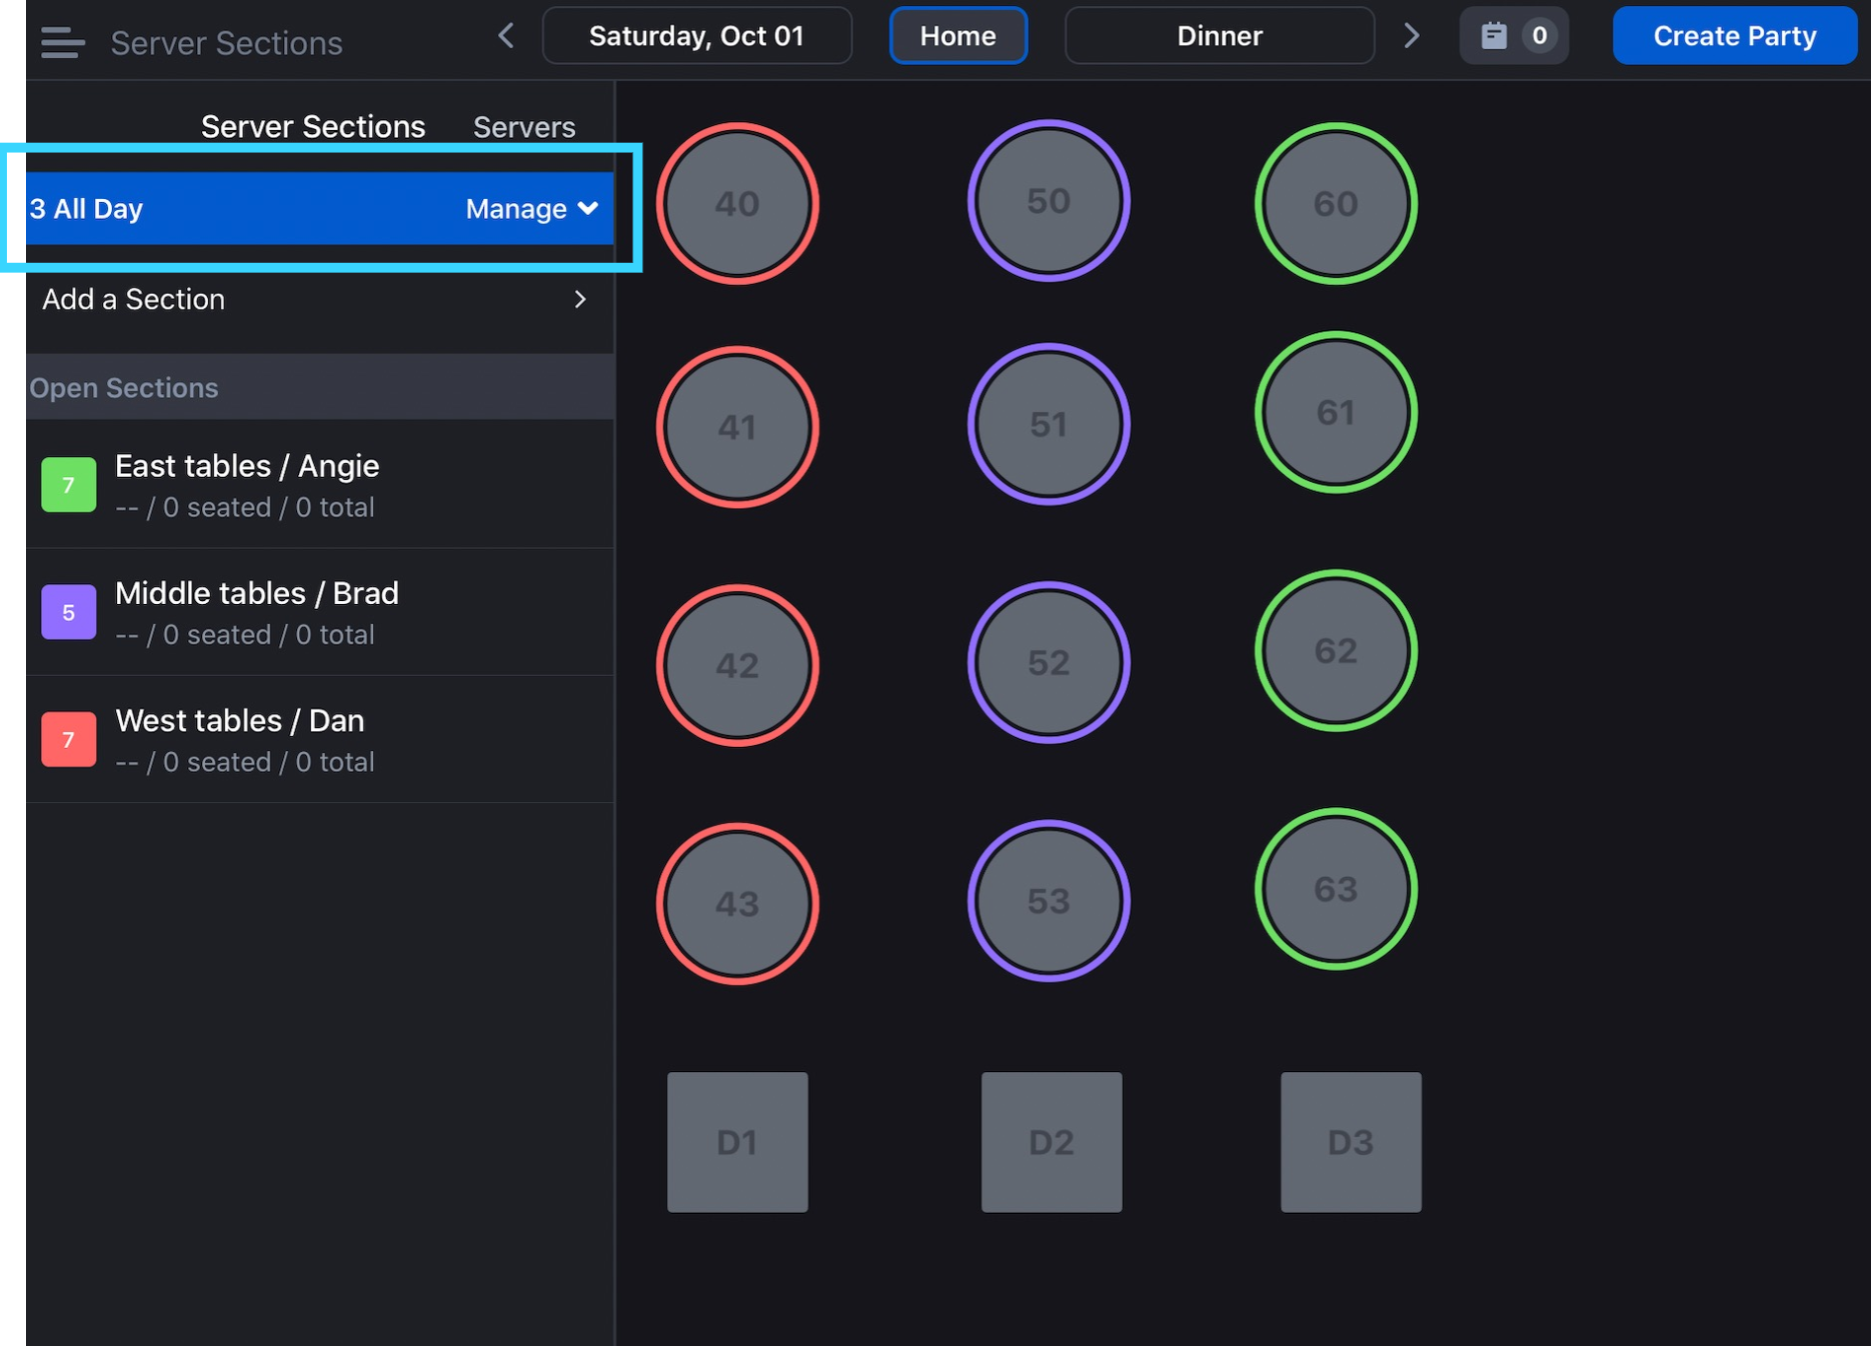
Creating a new layout will allow you to begin creating sections, assigning those sections to servers, and create new layouts for each specific need you might have in service. In the Server Sections tab, you will see a blue bar with the name of the current active layout.
To create a new layout, click Manage > Create New Layout which will then prompt you to choose a name for your new Layout. Choose a name and click Create.
You'll then be able to create server sections by clicking on the tab Add a Section beneath the blue bar.
Click the tables you'd like to be included in that server section, pick a color, and then click Assign Servers.
You will be prompted to click the blue bar that reads Save Tables.
The blue Manage bar will then turn orange. You must save that as well. Click Add a Section again and repeat the process until your dining room is complete with sections and their respective servers.
Selecting and Activating Layouts
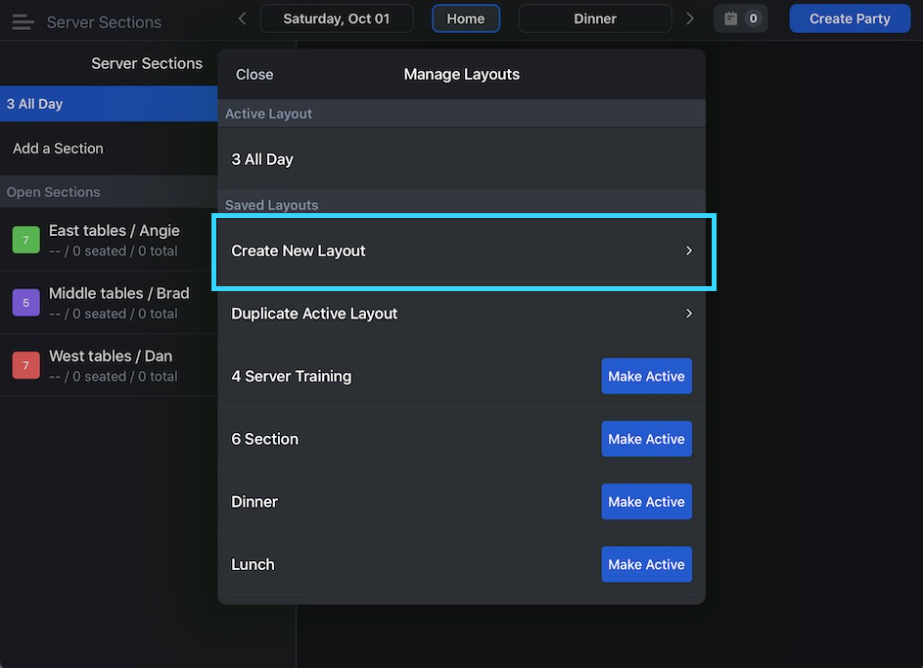
Let's say you want to pick a layout at the beginning of a shift or change layouts in the middle of a shift. When you save layouts while you are creating them, you are also saving them in perpetuity. This means that you can pick these layouts at any time.
To make an existing layout active, while in the Server Sections tab, click on the blue Manage bar. You'll see a heading labeled Saved Layouts.
Next to each layout you've created, you'll see a blue button that says Make Active. Click that button and the original layout you created will now be pulled up on your screen. You can assign servers and create sections using the same workflow from Creating Layouts, Sections, and Assigning Servers.
Cutting Servers
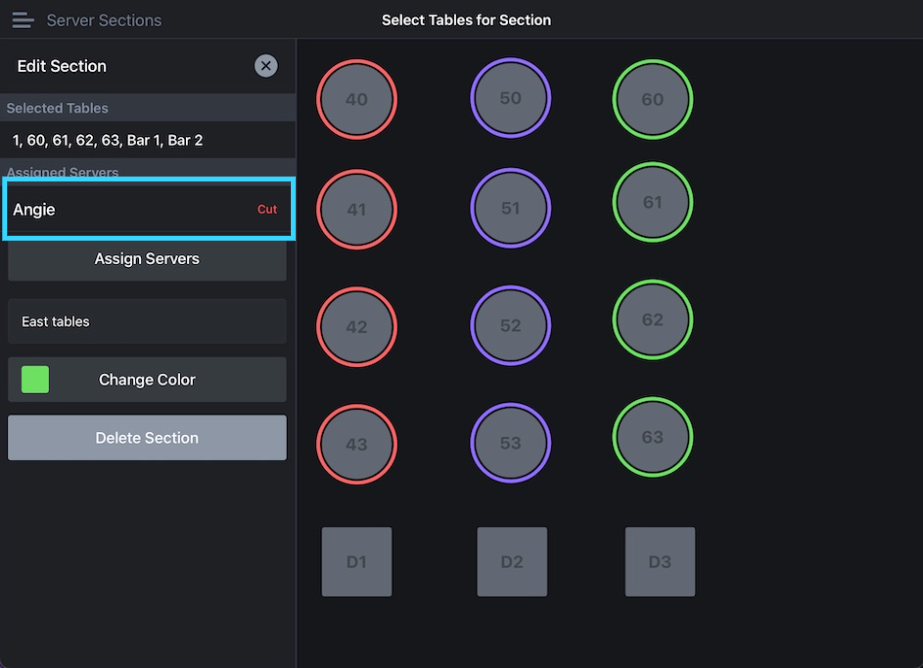
You can cut servers by clicking on the section associated with that server's name. When you click that section an Edit Section menu will appear on the left-hand bar of your iPad. Next to that server's name - underneath the header Assigned Servers, click the Cut button and the server will be cut from that section. Click the small X by the header Edit Section to go back to the main Server Sections screen.
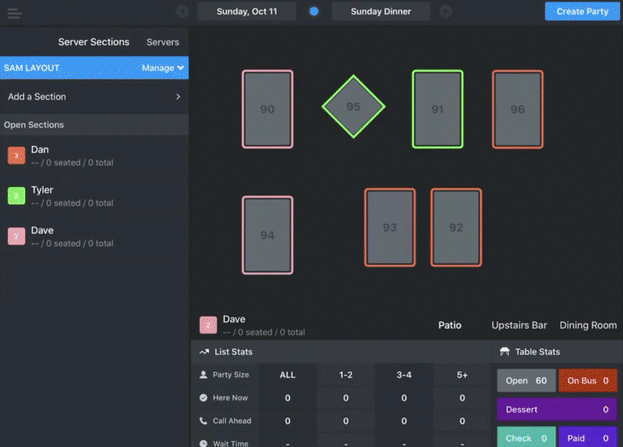
Reassigning or Unassigning Tables from Sections
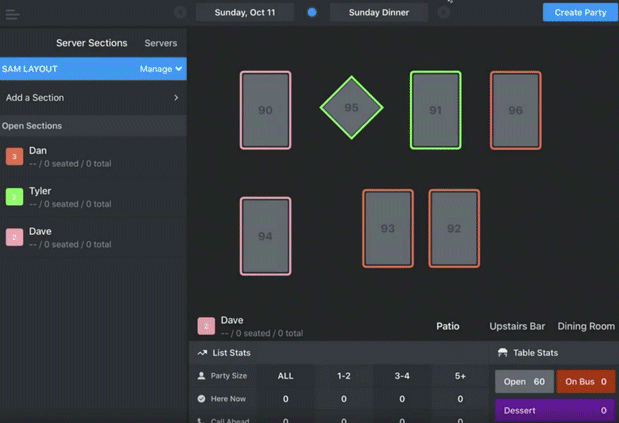
To change a table from one server's section to another's, simply click the name, and associated section of the server you wish to take over. Then, under that person's name, click the table that you'd like them to take. Click the blue Save Tables button and then, as always, save sections by clicking the orange the Manage bar.
In the following image, you'll see the user go into Dave's section and take over table 95, previously assigned to Tyler:
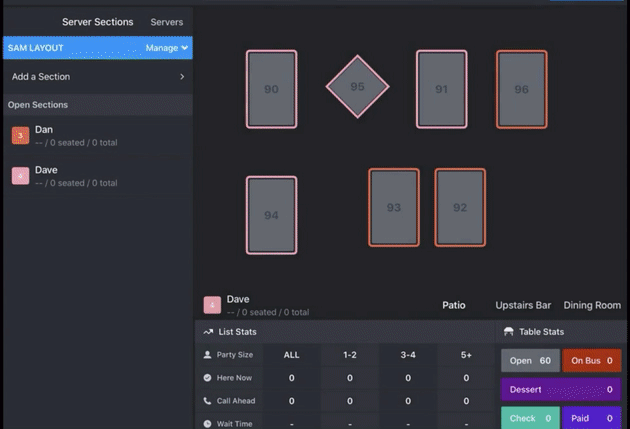
Removing a Section from a Layout
If you don't need a section, on a certain layout, let's say after you cut a server (see above), you can delete a section. Click on that section in the main Server Sections sidebar, and use the gray button at the bottom of the labeled Delete Section to delete the entire section. Remember that the blue Manage bar will change orange. Click it to save the server sections.
To unassign a table, click on the server with whom the table's section is associated. While in the Edit Section sidebar, click the table. It will now have no outline around it, indicating that it's unassigned. Again, click Save Tables and then click the now-orange Manage bar to save the layout.
In the following image, you'll see the user cut Tyler, delete his section, and then assign his remaining tables to Dave:
Deleting a Layout
You can delete your current layout or any of the layouts saved in perpetuity by clicking the blue Manage bar, clicking on the active layout (or any other previously created layout), and clicking the Delete Layout button which will be at the bottom of the next screen. Press Confirm Delete?. This will prompt you to select a new active layout.
Adding and Managing Servers
On the left-hand sidebar of the Server Sections page, you'll see the Servers button to the right of Server Sections. Click it and a box will pop up labeled Manage Servers with a list of your existing servers. To create a new server, click the blue "New" text. Here, you'll be prompted to enter a server's name. For existing servers, you can click their name to rename or delete by pressing the gray "Delete Server button at the bottom of the box.
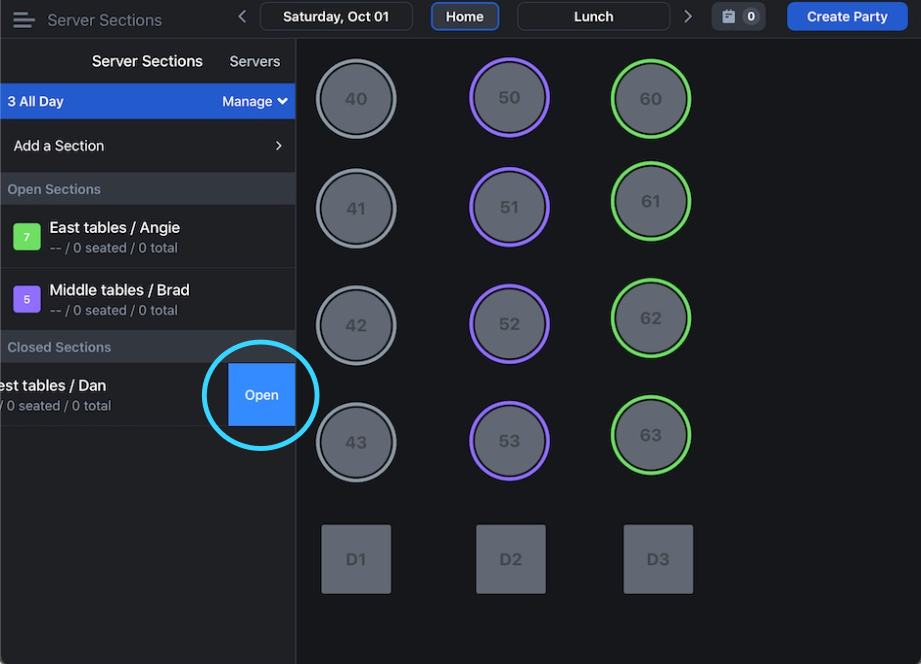
Closing and Opening Server Sections
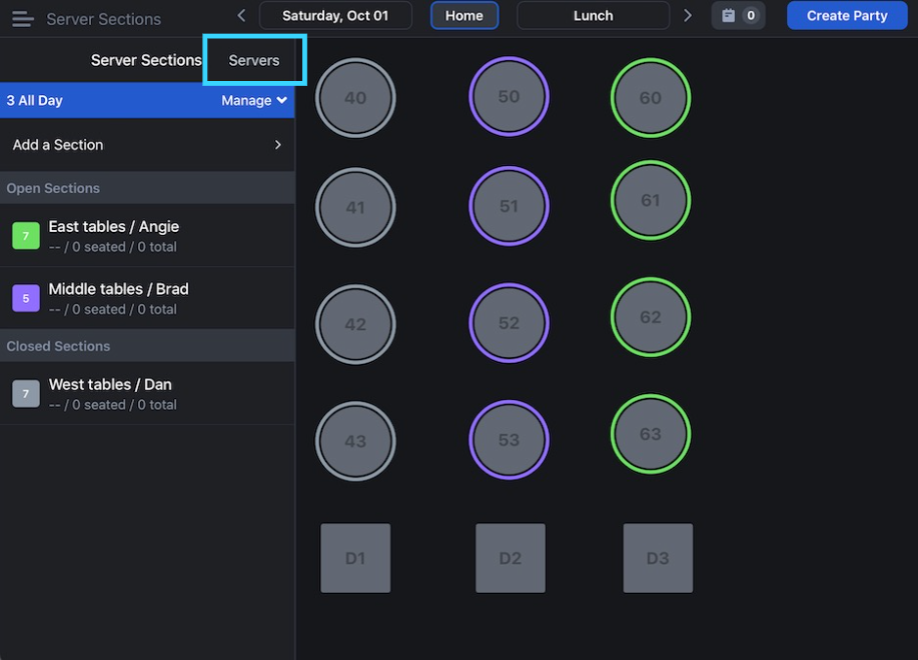
You can see all of your sections - and the servers assigned to them - in the left-hand menu. We organize these sections into two headers: Open Sections and Closed Sections. Under "Open Sections" you'll see active sections with a colored square. Under "Closed Sections" you'll see, if there are any, inactive sections that are associated with a grayed out square.
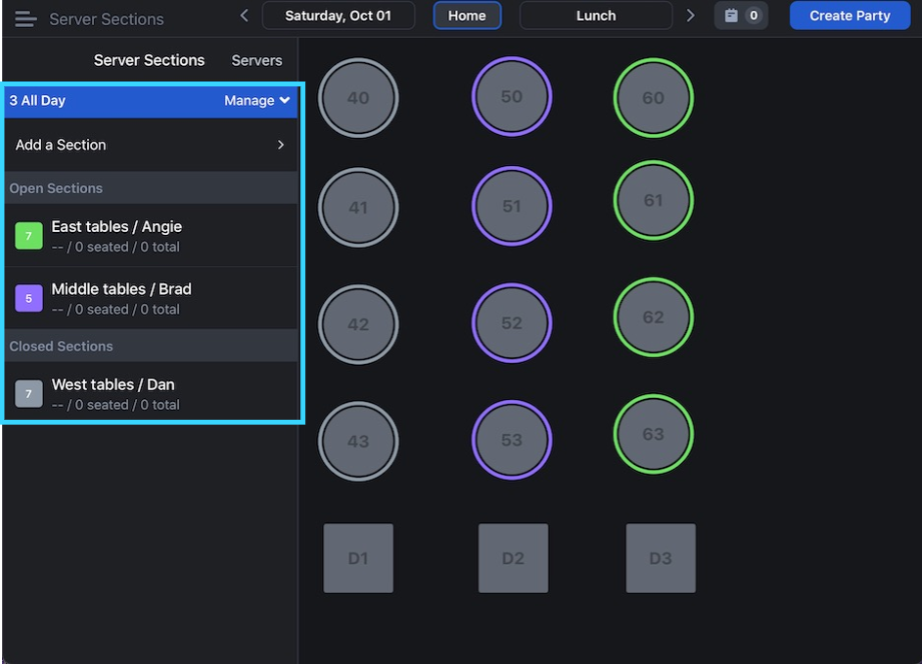
You might close a section when a server is cut or when servers come in at different times. For example, when using staggered in times, you can build layouts with the maximum amount of servers you'll have during a shift. You can close out sections that aren't being used at the beginning of a shift, so you can open them later. Or you can close out sections at the end of a server's shift. Just swipe left on the section and you'll have the option to close it.
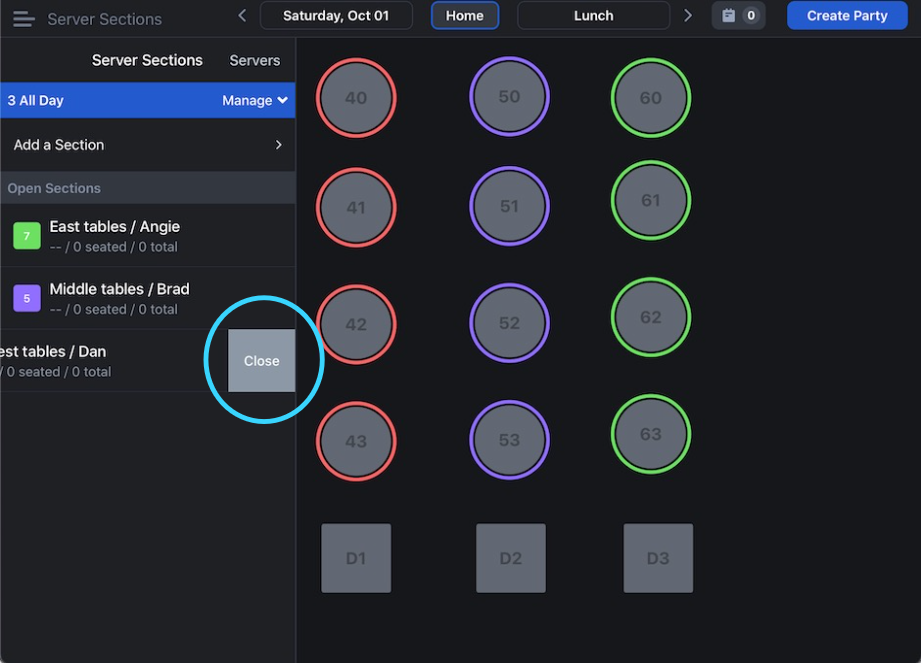
If you need to open a section, then just swipe left.
Bulk Opening/Closing Tables
Historically, closed tables could only be individually marked as Closed. Host app users now have the ability to select multiple tables at once and close or open them as a single grouping. (Host app version 2.1.7 required)
- Tap any table in the section or group of tables you want to include in the bulk action
- Tap the Combine/Bulk Edit button

- You can then select any additional tables to be grouped for an action
- The selected table numbers will appear under 'Selected Tables'
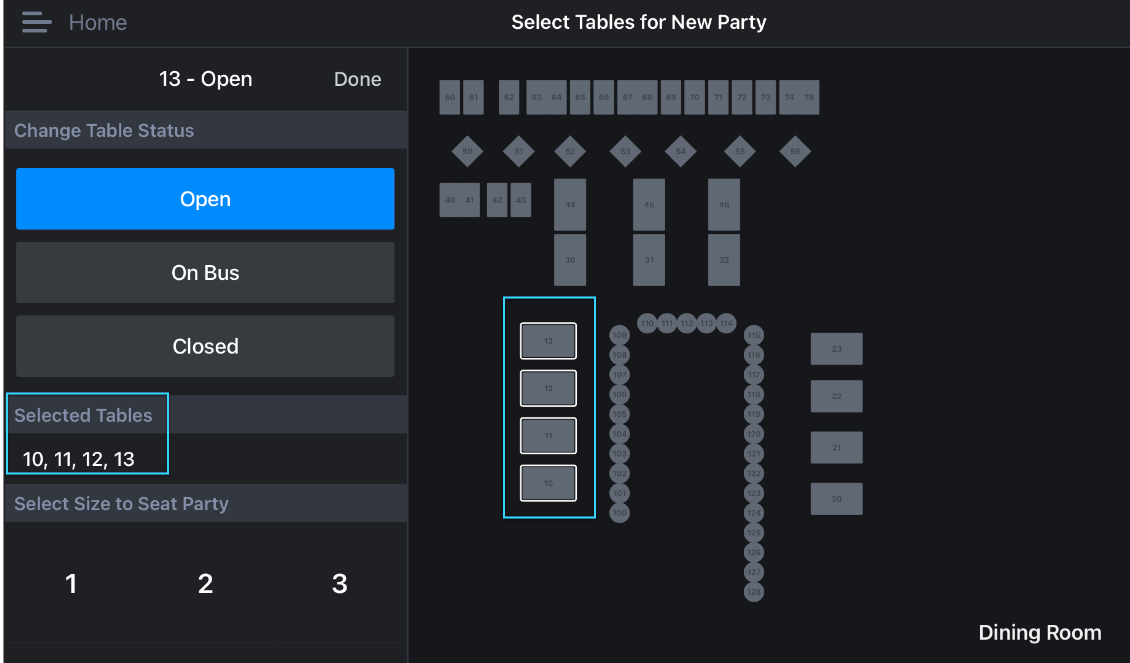
- Tap the button corresponding to the action you want to take - Open, On Bus, or Closed
- If the tables are Open and Closed is selected, all tables in the Bulk Edit group will be darkened and vice versa
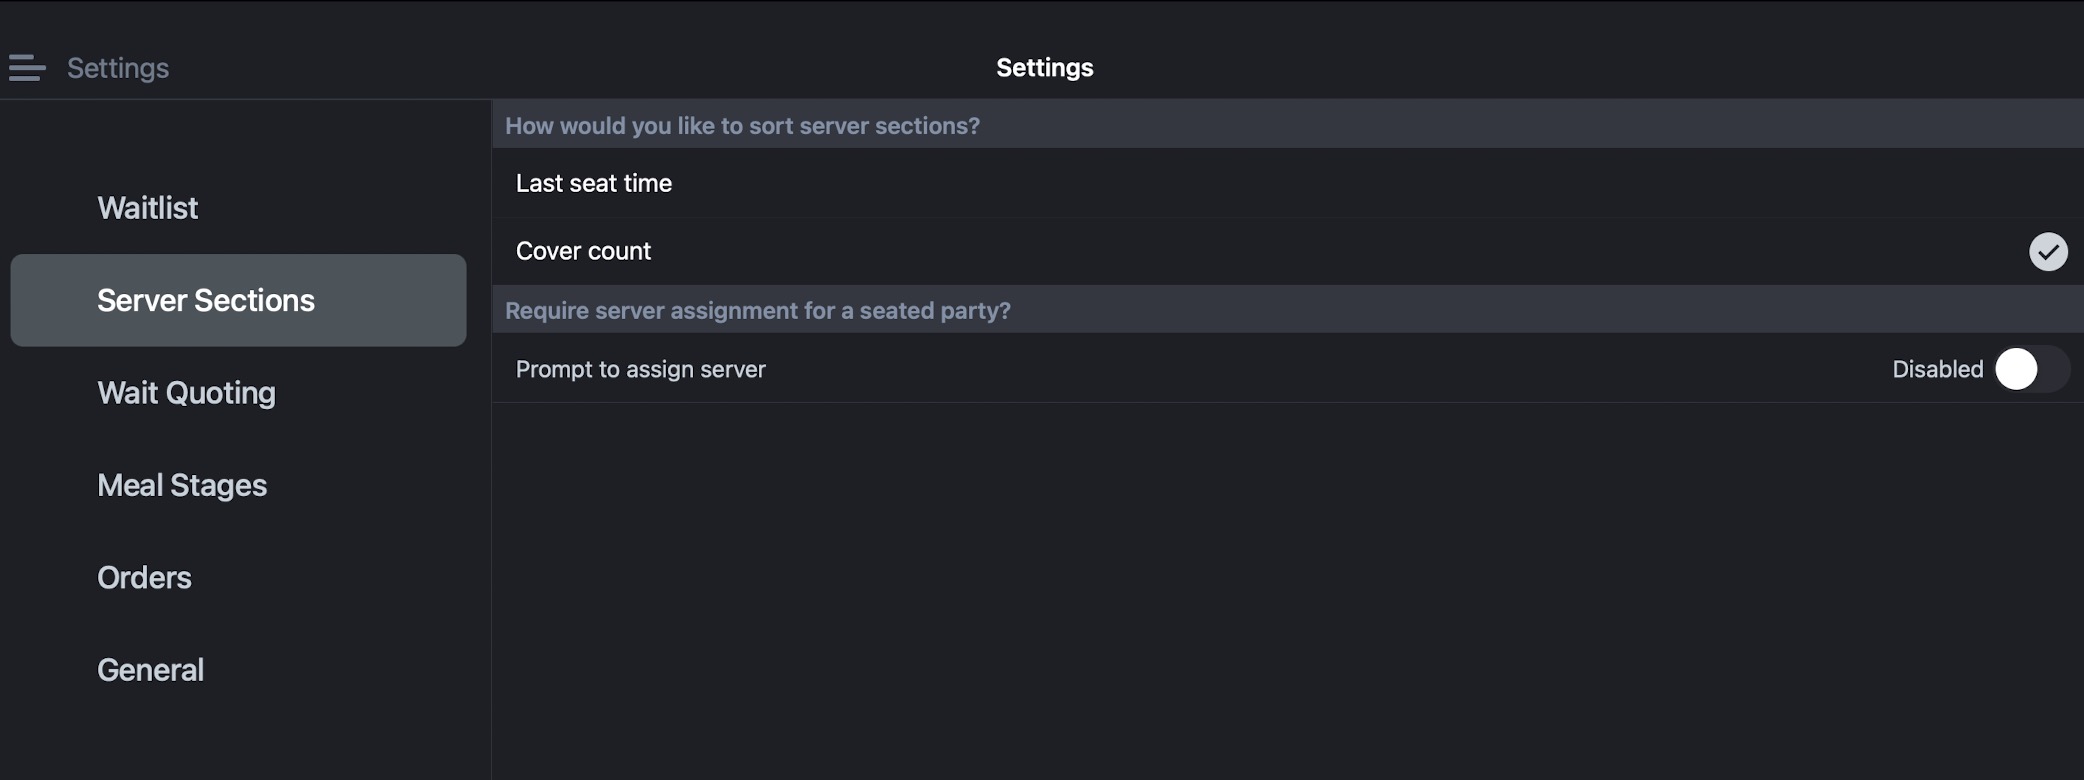
Server Section Settings
Some clients have access to update the Server section settings to determine how to sort server rotations, either by 'last seat time' or by 'cover count'
- Tap Home > Settings > Server Sections
- Tap the desired setting
- You can also decide is you want to prompt server assignments.
Server Names On Floorplan
Note: This feature requires configuration by our Support team. Contact Support to request activation.
Server Sections will need to be created with Servers assigned to the sections. With this satisfied, sections associated with servers will:
-
-
- Be outlined with the color associated with that server
- Have the server’s name listed on the floor plan and associated with the section
- If there are tables that are not associated with a specific server, then they will not have an outline surrounding the tables and no server name should be listed with those tables.
-
Floorplans are created and published in the Host Dashboard. In order to see your edits from the Dashboard, you'll need to reset the cache on your iPad.
Please visit our main Floorplan Tool article for information about how to edit your floorplan.